

Key Takeaways:
· Starting weight lifting post-40 is not only feasible but also immensely beneficial for overall health, emphasizing the importance of a clear, safe plan and consistent habits.
· Strength training post-40 offers significant advantages such as counteracting muscle loss, boosting joint resilience, and enhancing metabolic health, all while preserving energy and promoting mood balance.
· A progressive and structured approach, focusing on foundational movement patterns and aligned with proper recovery, nutrition, and technique will ensure long-term success and joint health.

Starting Weight Lifting at 40+: A Safe Guide to Building Strength
Here’s a truth that doesn’t get enough airtime: starting weight lifting after 40 isn’t just possible—it’s one of the smartest, most empowering health decisions you can make. You don’t need to be a gym veteran or have bulletproof knees. You don’t need hours a day, a fancy program, or a trainer who shouts. What you do need is a clear, safe plan, an understanding of how your body adapts, and a few simple habits that make strength training sustainable.
Why Strength Training Matters After 40
By the time you cross 40, you might notice some differences in your body-- slower recovery, creeping aches, and the stealthy rollout of sarcopenia—age-related muscle loss that can whittle away 3–8% of muscle per decade. Strength training counters all of it. The evidence is consistent: lift regularly and you preserve muscle, protect joints, stabilize hormones, and keep your metabolism from downshifting into permanent eco mode.
Here’s what the research says you gain when you pick up the weights:
· Counter muscle loss and boost functional power: Resistance training stimulates muscle protein synthesis, which helps you rebuild what time tries to trim. More muscle means better strength for everyday tasks—hoisting groceries, climbing stairs, or picking up a kid without the lower back revolt.
· Stronger bones, fewer fractures: Lifting signals your bones to lay down new tissue. That means higher bone mineral density and a lower risk of osteoporosis and fractures—especially important for women post-40 as estrogen declines.
· Joint resilience without the constant creak: Thoughtful, progressive loading strengthens the muscles and connective tissues that stabilize joints. Translation: more comfort, better mobility, fewer “my knee just hates me now” moments.
· Metabolic momentum: Muscle is metabolically active. Build it, and you burn more calories at rest, manage blood sugar more smoothly, and reduce visceral fat—the deep, stubborn stuff linked to cardiometabolic risk.
· Better posture and fewer desk-bound woes: Strengthening your posterior chain (glutes, hamstrings, back) counters the rounded shoulders and tight hips forged by long hours of sitting. You stand taller, move cleaner, and breathe easier.
· Mood, sleep, and stress control: Regular resistance work has been shown to reduce anxiety and depressive symptoms and improve sleep quality. It’s a reliable, repeatable way to offload stress without nuking your nervous system.
· Hormonal harmony, smarter aging: Strength training helps maintain insulin sensitivity and supports healthy testosterone and growth hormone dynamics. That’s code for better energy, sharper recovery, and higher quality of life.
Most importantly, strength training after 40 is about sovereignty over your own hardware. It’s not an arms race to a max deadlift; it’s controlled progression, good form, and steady consistency that stack into real outcomes. Two to four sessions per week, a focus on compound movements, and a plan that respects recovery—that’s the template. The goal isn’t to beat your younger self. It’s to build a version of you that’s more capable next month than you are today.
Mobility and Warm-Up Routines to Protect Joints
If you’re starting (or re-starting) weight lifting after 40, think of your warm-up as the insurance policy that keeps you training tomorrow. Joints that have dutifully handled decades of steps, sits, and screens need a little coaxing to glide through loaded movement. The goal: build heat, nudge range of motion, and “prime” the nervous system—without exhausting yourself before the first working set.
Here’s a clear, repeatable plan that balances mobility with activation, clocking in at 10–12 minutes.
· Step 1: Easy cardio (3 minutes)
o Pick a low-impact option: brisk walk, bike, or rower.
o Effort should feel like a 4/10—breathing deeper, not gasping.
o Why it matters: increases synovial fluid circulation inside joints, improving glide and reducing stiffness.
· Step 2: Spine and hips (3–4 minutes)
o Cat–Cow x 8 slow reps: move vertebra by vertebra; exhale into flexion, inhale into extension.
o 90/90 Hip Switches x 6 each side: stay tall; optional forward fold for extra external rotation.
o World’s Greatest Stretch x 4 each side: lunge, elbow to instep, thoracic rotation toward the front leg.
o Why it matters: improved thoracic rotation and hip rotation sets the stage for squats, hinges, presses, and rows without compensatory twisting.
· Step 3: Ankles and shoulders (2–3 minutes)
o Ankle Rockers x 10 each side: knee tracks over toes while heel stays down; use a wall for balance.
o Banded Shoulder Dislocates or PVC Pass-Throughs x 10: widen grip to keep ribcage down and elbows straight.
o Scapular Pull-Ups or Wall Slides x 8–10: focus on shoulder blades sliding and gliding, not shrugging.
o Why it matters: ankles control squat depth and knee comfort; scapular mechanics protect the rotator cuff under load.
· Step 4: Pattern primers (2–3 minutes)
o For squats: Bodyweight Squat to Box x 8, pause briefly at the box, drive up through mid-foot.
o For hinges: Hip Hinge with Dowel x 8, maintain three points of contact (head, mid-back, sacrum).
o For pressing: Half-Kneeling Single-Arm Press x 6 each side with a light dumbbell or band, ribs down.
o For pulling: Band Face Pull-Apart Combo x 12, elbows high-to-outside, slow eccentric.
o Why it matters: low-load patterning grooves form, wakes up stabilizers, and reduces “surprise” forces on cartilage and tendons.
Evidence-backed tips that add up:
· Favor dynamic over static: long static holds pre-lift can reduce peak power; save deep stretching for post-training or on off days.
· Grease the groove: 5–10 controlled reps per drill beats marathon mobility sessions. Consistency wins, not heroics.
· Tempo and breathing: pair exhales with end-ranges to reduce guarding; move slower than you think you should.
· Range with control: only go as far as you can own. If you can’t return under control, you went too far.
· Match the warm-up to the day: hips/knees for lower body days; shoulders/thoracic for upper; keep spine and ankles in play daily.
Red flags to watch for:
· Sharp, localized joint pain that doesn’t ease after a few warm-up sets.
· Pinpoint swelling, locking, or catching sensations.
· Numbness/tingling or pain that radiates beyond the joint. If any of the above show up, reduce load, adjust range, and consider a movement swap. If symptoms persist, get cleared by a clinician before pushing.
A simple weekly structure:
· Lower body days: emphasize ankles, hips, and thoracic rotation; add extra hinge and squat primers.
· Upper body days: emphasize scapular glides, thoracic extension, and rotator cuff activation; add push/pull primers.
· Active recovery days: 15–20 minutes of easy cardio plus the above mobility circuit at a relaxed pace.
The north star: joint-friendly training is a daily habit, not a once-a-month overhaul. Keep it short, repeatable, and specific to the lifts you’re about to do—your future self will thank you when the sets get heavy.
Foundational Lifts: Squat, Hinge, Push, Pull, Carry
Before you start chasing personal records or fancy accessory moves, build your routine around these five movement patterns. They reflect how your body actually moves in the real world, help balance strength across joints, and reduce overuse injury risk. For adults 40+, mastering these lifts with crisp form is the fastest, safest route to measurable progress.
· Squat (knee-dominant)
· Hinge (hip-dominant)
· Push (horizontal/vertical)
· Pull (horizontal/vertical)
· Carry (loaded gait)
Think of them as your weekly “north star.” Two to three sessions per week, with 2–4 working sets per pattern, is enough to move the needle—without grinding your joints to dust.
Squat: Build Leg Strength and Core Stability
· What it trains: Quads, glutes, core; supports stair-climbing, sitting/standing, and knee resilience.
· How to start:
o Beginner: Box Squat (to a stable box or bench), Goblet Squat
o Progression: Front Squat, Back Squat
· Form cues:
o Feet just outside hip width, toes slightly out.
o Inhale, brace your midsection like you’re zipping up a tight jacket.
o Knees track over toes; sit between your hips, not into your toes.
o Keep your chest proud and weight centered over mid-foot.
· Volume: 3 sets of 6–10 reps. Rest 60–90 seconds.
· Safety notes: If knees ache, use a slightly higher box, reduce depth, or switch to a split squat pattern to reduce joint stress.
Hinge: Protect Your Back, Power Your Hips
· What it trains: Glutes, hamstrings, posterior chain; essential for lifting groceries or picking up grandkids without a back tweak.
· How to start:
o Beginner: Hip Hinge Drill with dowel, Romanian Deadlift with dumbbells
o Progression: Kettlebell Deadlift, Trap Bar Deadlift
· Form cues:
o Soft knees, push hips back like you’re closing a car door with your glutes.
o Spine stays long; ribs stacked over pelvis.
o Keep the weight close to your body; feel tension in hamstrings, not in your lower back.
· Volume: 2–4 sets of 5–8 reps. Rest 90 seconds.
· Safety notes: If you feel this in your low back first, reduce the load, shorten the range of motion, and slow the eccentric (lowering) phase.
Push: Press With Control, Not Ego
· What it trains: Chest, shoulders, triceps, and scapular control; supports daily pushing tasks and posture.
· How to start:
o Beginner: Incline Push-Up (hands on bench), Dumbbell Floor Press
o Progression: Push-Up on floor, Dumbbell or Barbell Bench Press, Overhead Press
· Form cues:
o For horizontal push: Scapulas back and down, wrists stacked over elbows, ribs down.
o For overhead: Squeeze glutes, brace abs, avoid flaring ribs—press in a slight arc finishing with biceps near ears.
· Volume: 3 sets of 6–10 reps. Rest 60–90 seconds.
· Safety notes: Shoulder discomfort? Use neutral-grip dumbbells, reduce range of motion, or switch to landmine press to keep the shoulder in a safer groove.
Pull: Build the Back That Protects Your Shoulders
· What it trains: Lats, upper back, biceps, rear delts; counterbalances pushing and supports shoulder health.
· How to start:
o Beginner: Chest-Supported Row, Seated Cable Row, Assisted Pull-Up or Band Lat Pulldown
o Progression: One-Arm Dumbbell Row, Pull-Up/Chin-Up
· Form cues:
o Initiate by pulling shoulder blades toward back pockets.
o Keep ribs tucked; don’t crane your neck forward.
o Think “elbows to hips” on vertical pulls.
· Volume: 3–4 sets of 8–12 reps. Rest 60–90 seconds.
· Safety notes: If elbows complain, try a neutral grip and slow tempo to reduce tendon strain.
Carry: The Missing Link for Core and Grip
· What it trains: Grip strength, core stability, shoulder integrity, gait mechanics; fantastic for everyday resilience.
· How to start:
o Beginner: Farmer’s Carry with two dumbbells or kettlebells
o Progression: Suitcase Carry (one side), Rack Carry, Overhead Carry
· Form cues:
o Tall posture, ribs stacked, steps smooth and controlled.
o Don’t let the weight yank you sideways—resist and stay square.
· Volume: 3–4 carries of 20–40 meters. Rest as needed.
· Safety notes: Choose a load that challenges your grip without breaking your posture.
Weekly Template (30–45 Minutes)
· Day A:
o Squat: 3x8
o Push (horizontal): 3x8
o Carry: 3x30m
· Day B:
o Hinge: 4x6
o Pull (horizontal or vertical): 3x10
o Carry: 3x30m
Alternate A and B, leaving at least one rest day between sessions. Start light. When all sets feel crisp and you could do 2 more reps with perfect form, increase load by the smallest available increment.
Recovery and Progression: The Quiet Work That Wins
· Warm up with 5–8 minutes of brisk walking or cycling, then 2–3 easy sets of the day’s first lift.
· Use a 2–3 RIR (reps in reserve) buffer—finish sets knowing you had a couple reps left. This preserves joints and builds momentum.
· If joints feel grumpy, swap the implement, change the angle, or shorten range—don’t force it.
· Track weights and reps. Small, consistent jumps beat heroic one-off efforts.
Choosing the Right Weight, Sets, and Reps for Beginners
If you’re starting at 40 or beyond, treat your strength plan like a long campaign: steady progression, clean execution, no heroics that get you sidelined. Your body will reward measured, repeatable effort.
· Start light enough to move well. On your first pass with any lift, pick a weight that lets you complete the last 2–3 reps with focus, not grimacing. If your form unravels, the weight is too heavy. If you could easily knock out 10+ perfect reps when the plan calls for 8, it’s too light.
· Use the talk test for effort. During a set you should be able to say a short sentence, not deliver a speech. That’s roughly a moderate intensity, perfect for building skill and resilience.
· Make the final reps “honestly hard.” Aim for 1–3 reps in reserve (RIR). That means you rack the weight knowing you could have done 1–3 more perfect reps—but no more.
A beginner-friendly framework:
· Frequency: 2–3 nonconsecutive days per week
· Exercises per session: 5–6 compound-focused moves
· Sets: 2–3 sets per exercise
· Reps: 6–10 for compound lifts; 8–12 for accessory work
· Rest: 90–120 seconds between sets for compounds; 60–90 seconds for accessories
Core lifts to anchor your week:
· Lower-body push: goblet squat or leg press
· Lower-body hinge: hip hinge pattern like Romanian deadlift with dumbbells
· Upper-body push: dumbbell bench press or incline push-up
· Upper-body pull: one-arm dumbbell row or assisted pull-down
· Carry or stability: farmer’s carry or side plank
The first six weeks: a simple progression map
· Weeks 1–2: Learn the patterns. Use a weight that feels like 5–6 out of 10 effort. Keep 3 reps in reserve. Prioritize technique and tempo: 2 seconds up, 2 seconds down, no bouncing.
· Weeks 3–4: Nudge the dial. When you complete all sets at the top of the rep range with 2 reps in reserve and tidy form across sessions, increase the load by the smallest available increment (often 2–5 pounds per dumbbell).
· Weeks 5–6: Consolidate. Maintain the new load, keep form crisp, and add one extra set to your main lifts if recovery is good.
How to know when to increase weight
· You hit your target reps on every set, twice in a row, with at least 2 reps in reserve.
· Your final reps slow down but stay controlled—no shrugging, twisting, or momentum.
· Your joints feel fine the next day; mild muscle soreness is okay, sharp pain is not.
How to know when to hold or reduce
· Technique breaks on more than one rep per set.
· Joint discomfort during or after training (knees, shoulders, lower back) that doesn’t fade within 24–48 hours.
· Sleep or energy tanks after workouts—drop volume (fewer sets) before dropping frequency.
Form guardrails that protect progress
· Range of motion first. Go as deep or as high as you can without pain and without losing spinal alignment. Partial depth is acceptable at first; expand gradually.
· Neutral spine, packed shoulders, and stable feet are nonnegotiable. If you can’t keep them, the weight is too heavy or the exercise needs a regression.
· Tempo beats ego. Smooth reps build strength and control; jerky reps build frustration.
Sample beginner set-rep scheme for a full-body day
· Goblet squat: 3 sets x 8 reps, 90 seconds rest
· Dumbbell bench press: 3 x 8–10, 90 seconds rest
· One-arm dumbbell row: 3 x 8–10 per side, 90 seconds rest
· Romanian deadlift (dumbbells): 2–3 x 8, 120 seconds rest
· Farmer’s carry: 3 x 30–45 seconds, 60–90 seconds rest
Recovery notes that matter more after 40
· Keep rest times honest. Shorting rest is a stealth way to ruin form.
· Respect connective tissue. Tendons adapt slower than muscles; restraint now prevents setbacks later.
· Track one variable at a time: either add a small amount of weight or add 1–2 reps per set—not both in the same week.
When in doubt, default to the lighter option and flawless reps. Consistency lets you stack progress; sloppiness just stacks risk.
Nutrition and Supplement Tips for Lifters Over 40
· Prioritize protein at every meal
o Aim for 25–40 g of high-quality protein per meal, 3–4 times daily. Older lifters benefit from “protein dosing” to overcome age-related anabolic resistance.
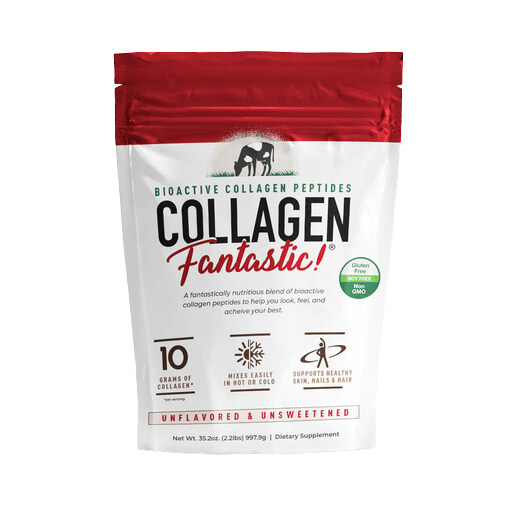
o Mix sources: eggs, Greek yogurt, cottage cheese, lean poultry, fish, tofu/tempeh, and grass-fed proteins, or our Whey Fantastic!
· Time your protein around training
o Pre- or post-workout protein within a 1–2 hour window supports recovery and muscle repair.
o If you train fasted early in the morning, a quick protein shake or a small snack (like yogurt and fruit) can blunt muscle breakdown.
· Build a plate that moves the needle
o Half plate: colorful vegetables and fruit for fiber and antioxidants.
o Quarter plate: protein.
o Quarter plate: smart carbs (oats, quinoa, potatoes, rice) to replenish glycogen.
o Add healthy fats (olive oil, avocado, nuts) to support hormones and joint health.
· Hydrate like it’s your job
o Muscle, tendon, and disc health all rely on adequate fluids. Target pale-yellow urine and add electrolytes if you sweat heavily or train in heat.
o Don’t forget sodium—especially if you’re low-carb or sweating buckets.
Conclusion: Start Smart, Stay Consistent, See Results
Starting weight lifting after 40 isn’t a gamble—it’s a calculated advantage if you approach it with patience, good form, and a plan. Begin with movement quality, nail the fundamentals—hinge, squat, push, pull, carry—and let progressive overload do the slow, steady magic. Pair two to four strength sessions per week with recovery that actually means something: sleep, protein, hydration, and mobility work. Track what matters: sets, reps, how you feel, and what gets easier. That’s where momentum lives.
FAQs: Starting Weight Lifting at 40+
Is it too late to build significant muscle after 40?
No. Research shows adults in their 40s, 50s, and beyond can add meaningful lean mass and strength with progressive resistance training. While recovery might take a touch longer, the relative gains (percent increase) are comparable to younger lifters when programs are well-designed: 2–4 sessions per week, emphasis on compound movements, and steady progression. Nutrition and sleep tilt the odds even further in your favor.
How long should a beginner-level strength session last for older adults?
About 30–45 minutes is plenty, including a 5–10 minute warm-up and a brief cool-down. Aim for 6–8 total working sets per major muscle group per week to start, spread across two or three sessions. Keep rest periods 60–120 seconds, move with control, and stop 1–2 reps shy of failure to reduce injury risk while still stimulating growth.
Do women over 40 need different lifting routines than men?
Not fundamentally. Squats, hinges, pushes, pulls, carries—these work for everyone. Women may benefit from:
· Slightly higher rep ranges (8–15) for certain lifts
· Extra hip- and glute-focused work to support pelvic stability and posture
· Periodic checks on iron and vitamin D levels Intensity, progression, and recovery principles stay the same across genders.
Can strength training help manage menopause or andropause symptoms?
Yes. Lifting is linked to improved mood, better sleep, reduced hot flashes, increased bone density, better insulin sensitivity, and enhanced libido. Pair strength training with adequate protein, vitamin D, and calcium—and speak with a clinician about individualized strategies if symptoms are disruptive.
What minimal equipment is best for starting at home?
· Adjustable dumbbells (or a few fixed pairs)
· A set of loop and long resistance bands
· A sturdy bench or step With these, you can hit every major muscle group and progress for months. Add a pull-up bar or suspension trainer later for more variety.